Happy Color Snack Sunday!
My 100 Day challenge of color snacks is in full swing and I wanted to combine it with my weekly tutorial.
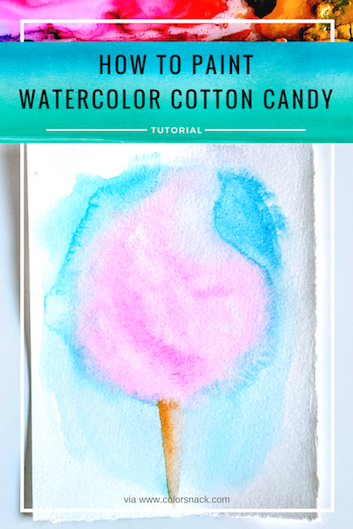
I came across some cotton candy images that just stole my heart and so I wanted to figure out how to make it into a quick and easy tutorial.
After several trials, I went for the easiest option – wet on wet! This technique is quickly becoming one of my favorites because that is where watercolor shines the most! Just let the water do the work and see the magic unfold!
(Recommended) Watercolor Supplies:
-
- watercolors
- watercolor paper
- Water brush
- Paper towel/towel
- Your creativity
- A good & happy soundtrack
A happy playlist soundtrack:
Let’s get to sketchin’!
How to Sketch Watercolor Cotton Candy
Step 1. Glaze your watercolor paper.
This can be a little tricky, but with enough practice you will get the hang of it. It is important to make sure that the watercolor paper is properly wet, but not dripping with water. Otherwise it will not create a cool effect, but rather be super drippy.
Step 2. Add in the background first, by outlining a rough shape of your cotton candy.
Think of this shape as a rough oval with a little tip on the top. Don’t forget to include the stick for the cotton candy. I am using here Cerulean Blue by Daniel Smith, but you’re welcome to use any other type of blue that reminds you of summer & childhood cheer.
Step 3. Clean your water brush and load it up with your favorite pink watercolor (I am using Opera Pink by Daniel Smith, and I recommend it because it’s very vibrant and beautiful). Fill in the shape with a light layer of pink for your cotton candy.
Step 4. Because we are working with wet-on-wet watercolor technique, the edges will bleed a little into the background. But that’s totally ok! We want that, because it gives off this dreamy effect for us to play with it.
Step 5. Add in a few C-shape curves on the cotton candy with a second layer of watercolor (more pigment, less water) to show off those cotton candy edges. Keep adding pigment to those areas to make them darker so that your watercolor sketch has more dimension.
Step 6. For the cotton candy stick, use a light brown or orange, or in my case I used Burnt Sienna color. Make sure to leave a light highlight on one side of the stick. And you can go a little darker with more pigment on the other side of the stick.
Et voila! Your cotton candy sketch is ready!
You can also check out the full video for this tutorial to see it in action.


