")
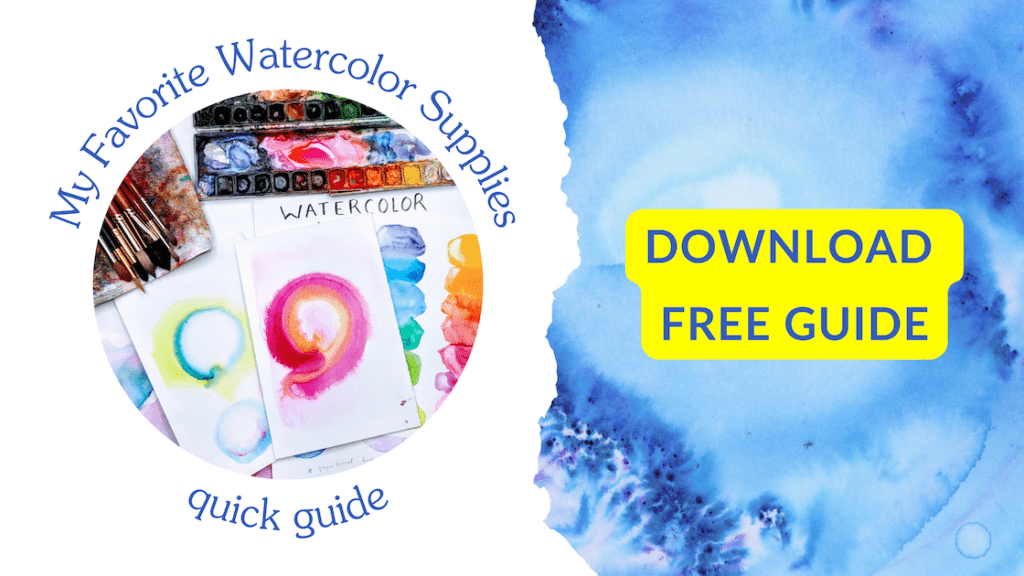
Hi sweet friend! If you’re here, you must be curious about my recommended watercolor techniques for beginners. These are techniques I always share in my in person and virtual workshops and online courses.
These watercolor techniques are a great starting point on your watercolor journey. They are also included in my books Watercolor Snacks and Watercolor 101.
1. Wet-On-Wet Watercolor Technique
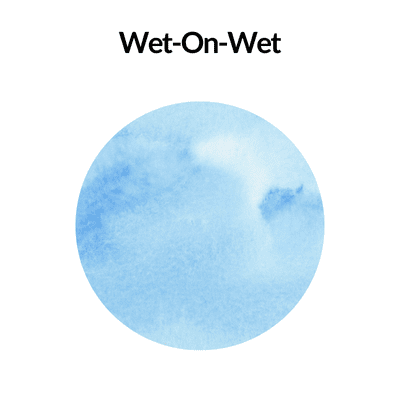
The wet-on-wet technique is one of the main and most common watercolor techniques. It means that we take a brush loaded with clear water and wet an area of the paper. Then, while that area is still wet, we drop in colors. This technique creates what you would refer to as a quintessential watercolor look. The water on the paper allows the colors to flow, mix, and spread within the wet area. As a result, this technique produces a soft look and feel.
2. Wet-On-Dry Watercolor Technique
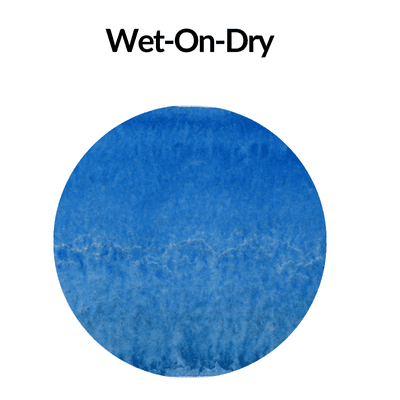
Wet-on-dry is the next most common watercolor technique and gives you more control (compared to wet-on-wet). It simply means that we load up our brush with color and start painting on dry paper. You will notice that with the wet-on-dry technique our brushstrokes will have hard edges. This is because we are painting directly on dry paper, so the pigment will form a hard edge once it dries, and the area of the painted shape will be more uniform as opposed to the flowing look of the wet-on-wet technique.
3. Watercolor Glazing Technique
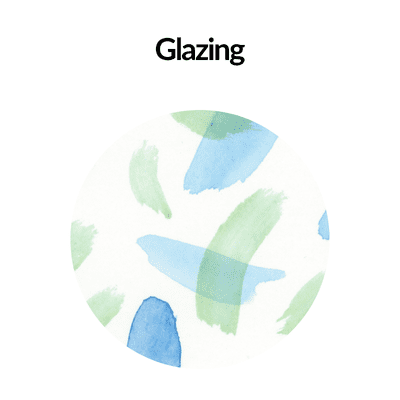
Watercolor glazing is another common technique that sounds more complicated than it actually is. A glaze simply means applying a layer of paint over a layer that is already dry. Watercolor glazing is a great technique to use when we want to add more depth to a painting, because the more layers we add (allowing them to dry in between) the darker the value of the color will become, and as a result, it will look more vibrant and intense.
Note: Some watercolor pigments are more opaque while others are more transparent. When using opaque colors, the glazing effect won’t work as well as opaque colors won’t allow the previous layer of color to show through the second layer. Glazing with transparent colors can create a beautiful glowing effect.
4. Softening Hard Edges Technique
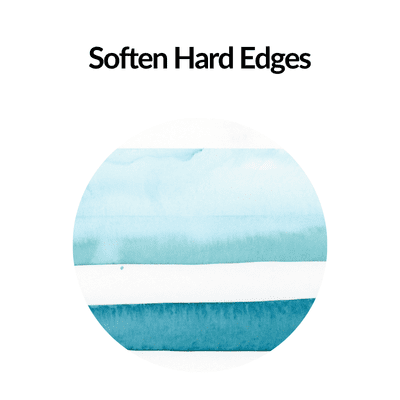
To soften an edge, we’ll need to grab a damp brush pen and go over the edge of the shape we want to soften. Using a left to right motion of the brush pen, we’re basically tickling the paper until the edge becomes soft and the hard edge disappears. This will work best if the area we’re softening hasn’t completely dried yet. But even if dry, it is possible to gently soften a hard edge.
Note: This softening technique won’t work as well with staining colors (which most commonly are your reds or vibrant pinks and purples) because staining colors bind to the paper making it harder to lift off the paint.
5. Dropping in Color Watercolor Technique
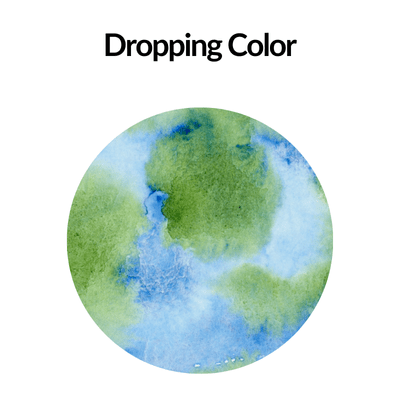
Dropping in color means that we load our brush pen with pigment that has been diluted in a few drops of water and then barely touch the paper with our brush tip. This way we are not exactly painting but we are simply “dropping” some of the color onto the paper so the little droplets can naturally blend within the area they are being dropped.
6. Dry Brush Watercolor Technique
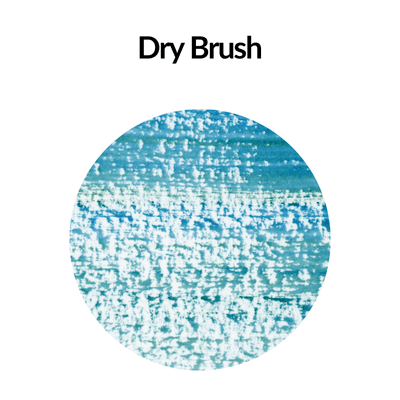
Dry brush is a technique created with a sparsely loaded brush to create interesting textures. The best brush for this effect is a flat brush, which allows for very little water to be absorbed into the bristles. Make sure your brush is as flat as possible when applying this technique to get the best dry brush texture.
7. Flat Wash Watercolor Technique
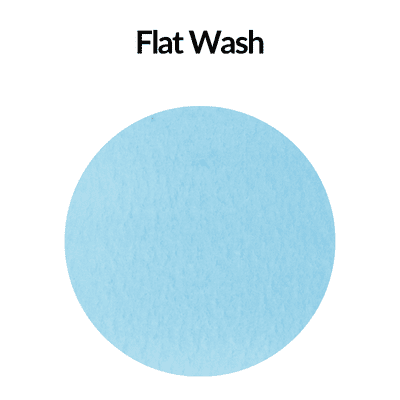
A flat wash is a watercolor technique that creates an even tone of color. It is created by applying smooth layers of color, typically with a large mop brush.
You’ll want to make sure you have enough of your color mix when you are creating a flat wash. Adding a layer of water first also helps with this technique (but make sure it’s not too much water so the paper buckles).
You have to work fast in order for this technique to work, dragging the brush on the paper in a continuous motion as you travel down the page. This will ensure you have an even layer of watercolor once it dries.
8. Gradient or Graduated Wash Watercolor Technique
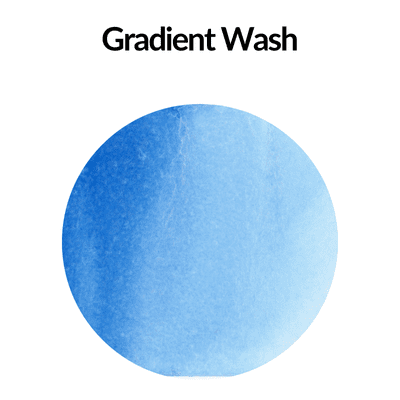
This is another of my favorite techniques and it is perfect for when we want a smooth transition from a highly saturated color (the darkest value) to a very desaturated color (the lightest value, think almost paper white). To achieve this, we’ll start with a simple shape and paint just the top area with a very saturated color of choice. Then, while the painted area is still wet, we’ll clean off our brush.
With the damp brush we’ll apply pressure over the painted area so we use all the bristles (not just the tip). We don’t add any more pigment but rather the damp bristles will drag some of the paint from the saturated area, and as we drag the brush away from the painted area, the color will become less and less saturated. Apply pressure and then move the brush from left to right as you drag the color down the page.
Note: For this technique to work we must move and drag the clean brush before the color dries on the paper. It is similar to the softening the edge technique, but on a larger scale.
The result will be a look that goes from a very saturated dark value to a very desaturated light value. We are essentially diluting the color as we drag it down the paper and the introduction of more water (from the brush) allows for the color to become less intense, hence a lighter value.
9. Variegated Wash Watercolor Technique
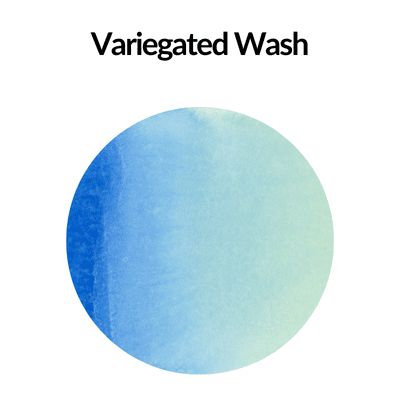
We can start with one saturated color (so it’s a dark value), then we can leave a blank space, and then we paint a second color. Now we can use the same technique as before and drag one of the colors into the other. Since we left a blank space between the colors, this will be the area where the colors will blend together into a nice soft transition. Essentially, we’ll end up with three colors: the two saturated colors on each end and the resulting mixed color in the middle.
Note: To achieve the best results with this technique, be sure to have plenty of water in your pigment so it is easy to drag one color into the other. You can even add one or two drops of water in the middle area to help the colors mix together. If the paint is too thick (meaning it doesn’t have enough water to work with), it will be difficult to combine the colors on the paper.
10. Lifting Off a Highlight Watercolor Technique
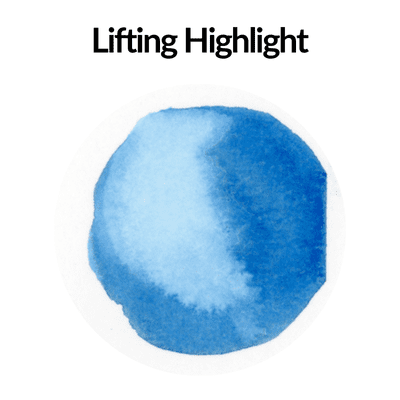
This is one of my favorite watercolor techniques. I love that watercolor allows us to essentially lift off a brush mark or some color to get a desired look or effect.
We’ll start by painting in our shape with a solid color. Assuming the light source is coming from the left side, we’ll add a highlight on that side by lifting off some of the color we just painted. To do this, while the paint is still wet, grab a clean brush and using pressure on it, drag it down the left side of the shape. After you have done this once, clean off the brush on a towel. Repeat this process (and the part about cleaning off the brush) a few times until you have lifted off enough color that a nice highlight has been created.
11. Splattering Watercolor Technique
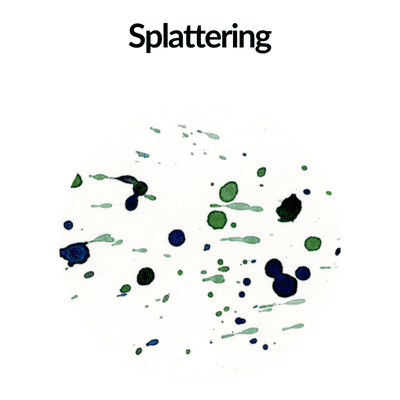
This is a really fun technique to add some unexpected watercolor textures and effects. You can use your brush or a toothbrush (loaded up with watercolor). As you run your finger across the toothbrush bristles (or if you tap on your brush) you’ll get a variety of splatters on your paper.
Experiment with this technique on dry and then on wet paper to see different results.
12. Adding a Cast Shadow
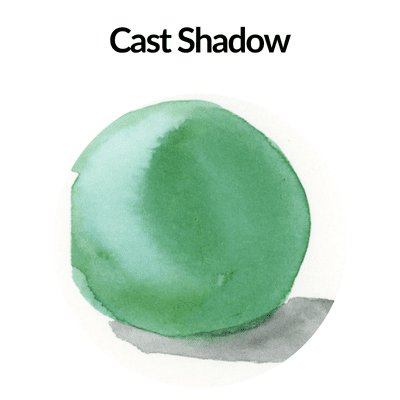
A cast shadow is a shadow that is formed when an object casts a shadow on another surface such as the surface it’s standing on.
While there are many ways of mixing colors to get a nice gray-colored shadow, when you’re painting on location you can just grab a little bit of Payne’s Gray (which is a cool gray), or any black that you have on hand, and dilute it with a bit of water to create your shadow. I like the way Payne’s Gray shadows look so I use that most often for a quick outline of a shape to give it more dimension.
You can either add a thin layer of water on the intended area (using the wet-in-wet technique) or you could do it wet-on-dry. Either way, you’ll need to clean off the brush after the first layer and then help spread out the paint into a smooth transition from a vibrant value to a very light one (typically moving the brush from left to right to soften the edges).